Friday, November 27, 2009

Buttermilk cake with Brandied Cranberries and Caramel


I made this cake for a dinner party last week and it was a total FAIL, I used too much buttermilk and it looked a lot like cobbler when it came out of the pan. I took it to the party anyway and it was devoured, the cake plate was scraped dry of any trace of caramel or brandied cranberry sauce. It was obvious I was going to have to remake it and make it more solid. (I remade it twice more; #2 had too much flour and this is #3.)

This is the one that I made for Thanksgiving this year, alongside a pumpkin tart. Thanksgiving at my house was 14 (15?) people, including some of my favorite bar friends and my best friends and some people who feel like family. We finished cooking a few hours later than expected but it was worth it to have new friends helping prepare the food while they drank and mingled, while I played queen of the kitchen and enjoyed the lively conversations just outside my tiny kitchen.

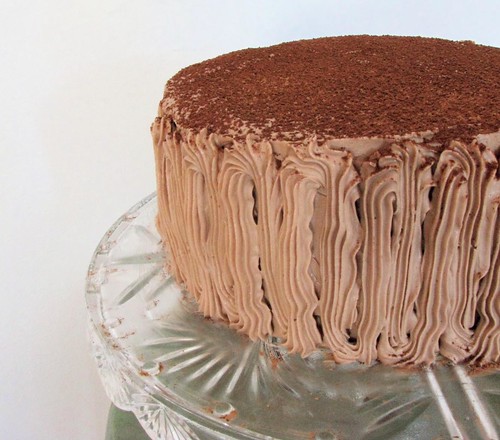
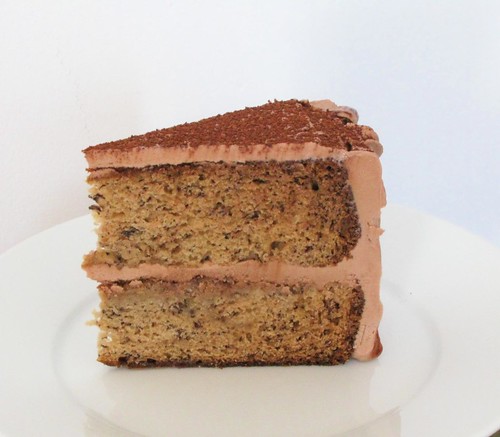
This is what it looked like when everything was done:

Buttermilk Bundt with Brandied Cranberries & Caramel

2 cups + 3 tablespoons all purpose flour
1 tsp baking powder
3/4 tsp baking soda
1/2 tsp salt
1/2 cup unsalted butter, softened
1 cup sugar
2 tsp vanilla
2 large eggs at room temperature
1 cup + 2 tablespoons buttermilk
1/2 batch brandied cranberries (see below)

Preheat the oven to 350º.
Sift the dry ingredients in a small bowl and set aside.
In a medium bowl, beat the butter and sugar at medium speed until fluffy. Scrape down the bowl and beat in the vanilla. Add the eggs one at a time, beating well after each. Scrape down the bowl again and beat in the buttermilk at a low speed until just combined. Add flour 1/3 at a time, beating until just combined.

Pour into a well-greased (I recommend spray) bundt pan and bake in the middle of the oven for 35-40 minutes. Let cool about 15 minutes before trying to remove the cake from the pan. Let the cake cool completely before adding this:

Brandied Cranberries
3/4 cup water
1/2 cup brandy
1/4 cup honey
2 tbsp lemon juice
1/4 tsp ground cardamom
1/4 tsp ground nutmeg
12-oz bag of fresh cranberries
2 tbsp corn starch

Whisk together everything but the cranberries in a sauce pot, then add the cranberries and bring to a boil. Reduce heat and simmer, whisking occasionally, for about ten minutes. Scoop some of the juice into a small bowl and stir in the corn starch until fully dissolved, then whisk the mix back into the pot. The sauce will thicken as it cools.

Caramel

1 cup heavy cream
1/2 cup light brown sugar
1 tbsp corn syrup
pinch of salt
1 1/2 tsp vanilla

Bring the cream, sugar, corn syrup, and vanilla to a boil in a sauce pot over medium heat, whisking to dissolve the sugar. Boil 12-14 minutes (yes that long), whisking frequently to prevent sticking. Add the vanilla. Pour the caramel over the cake while the caramel is still warm, but let cool before serving.

Friday, November 20, 2009

Fried Chicken, Corn Bread, Macaroni & Cheese, and Sweet Potato Chips


I just got back from nearly a week in Florida. Now, I know Florida isn't the south, but my family is largely North Carolina based and there are a lot of grits and biscuits involved when I go home. Yesterday I made biscuits and sausage gravy for breakfast, and this for dinner. When I'm in a food mood, there's no stopping me from taking the theme as far as my grocery store will let me. Don't be surprised if there's pulled pork on this blog soon.

Some people have joked over the years that I should open a restaurant and call it Beige, since most of my favorite foods are shades of brown. Har har har. But there's a salad! I was going to make green beans but I forgot to get them at the grocery store. I also meant to make the sweet potato chips with peanut oil, but discovered too late that I was out of it and had to use vegetable oil, which, sadly, doesn't make for crunchy oven chips. They were really tasty though!

Anyway, I hope you don't mind, but I seem to be on a kick of posting whole meals. I'm leaving off the apple tartlets for now, but there was dessert, too. Of course.


Fried Chicken
1 whole chicken cut into pieces
1 cup flour
3 eggs
1/4 cup milk
1/4 cup beer
1/4 tsp garlic powder
1/4 tsp chili powder
1/2 tsp adobo
1/2 tsp paprika
2 more cups flour
1 more tsp paprika

Heat 1 1/2" or so of oil in a large skillet or frying pan over medium-high heat (350º if you have a thermometer). Drip one drop of water in the oil, if it sizzles the oil is ready. Put 2 or 3 pieces of chicken into the batter, then into the flour, then immediately into the oil. Flip them over when the batter is golden, it should take 10-15 minutes to cook thoroughly. Drain on paper towels before serving. I like to put the first batch in the oven to cook more and stay warm while I cook the rest.


Corn Bread
1 cup yellow cornmeal
1 1/4 cup all purpose flour
1 cup sugar
2 tablespoons baking powder
1/2 tsp salt
4 eggs at room temperature
6 tablespoons butter
1/3 cup vegetable oil
1 cup milk
1/2 cup buttermilk
1 12.5-oz can creamed corn

Preheat oven to 350º. Grease a 9x13 or 9x9 pan (f0r thicker cornbread) or line muffin tins with paper.
In a medium bowl, whisk the eggs. Melt the butter and pour it into the eggs in a steady stream while whisking. Now whisk in the oil, milks, and cream corn, then stir in the dry ingredients until just combined and pour into pan. Bake in the middle of the oven for about 30 minutes, rotate the pan, and bake another 10 minutes.


Sweet Potato Chips
4 or 5 skinny sweet potatoes
1/4 cup peanut oil
kosher salt

Preheat the oven to 400º.
Slice the sweet potatoes as thinly as you can, use a food processor if you have one. Coat them with peanut oil, spread on a foil-lined cookie sheet (for easy cleanup) and bake until they are browned around the edges, roughly 30 minutes. Sprinkle with kosher salt before serving.


Macaroni & Cheese
1/2 pound (half a box) elbow macaroni
6 tbsp butter
1/4 cup flour
3 cups milk
1 tbsp mustard
1/2 tsp Worcestershire sauce
1/2 tsp paprika
12 oz shredded cheese (I used extra sharp cheddar & monterey jack)
salt & pepper to taste

Cook the macaroni as directed, but drain when it gets slightly al dente, as you will be cooking it further. Set the pasta aside after draining and toss it with half of the butter to prevent sticking to itself. In the same pot you cooked the pasta in, melt the rest of the butter over medium heat and whisk the flour in, turn down to low and keep whisking for 2-3 minutes. Turn up to medium heat and add the milk in a slow stream, whisking constantly. Add the seasoning, then whisk in the cheese. Adjust seasoning as needed, then stir in pasta. Continue to cook over medium-low heat, stirring frequently until the pasta is cooked through. Sprinkle with with breadcrumbs if desired.
If you have a casserole dish (I don't! Why!?) you can transfer the macaroni to it just after stirring in the pasta, and bake for 20 minutes.

Thursday, November 19, 2009

Welcome, Jesse!


(left to right: Jesse, Rachel, Me, Diane.)

Those of you who read this blog all the time have heard of my friend Jesse, the co-creator of the black bean mushroom soup and, as you'll see later today, some seriously good thin-crust pizza. When we work together we read each other's minds, and always with delicious results. I have invited her to be my partner in this blog, because two heads are better than one, and two New Yorkers have more time than one. It's a fact. Now you will be sure to find more frequent and more varied posts here, something I for one am definitely looking forward to.

Welcome aboard, Jesse!

Monday, November 16, 2009

The Wedding Cakes!


CONGRATULATIONS, MOM!!

My mom got married this weekend, and these are the cakes I made for the joyous occasion. I know some of you will be relieved that my cake-fest is over, but I have bad news for you: It's not. I have started selling batches of cupcakes, and am working on getting myself some business cards....so there will still be a lot of cake recipe testing to come. You'll just have to bear with me. Meanwhile, I have a new stepdad, and that's pretty cool.

These cakes were my wedding present, and they are all cakes which have made appearances on this blog before because I worked on the recipes all summer in preparation. From top left: Carrot cake, Black Chocolate Cake, and Banana Cake with Nutella icing.


(who knew blueberries were so vivid green on the inside? I'd never noticed before!)


The chocolate cake was the most popular, and was the first to be polished off. The kids present didn't know what to make of a chocolate cake with blueberries & raspberries inside and on top, but there were a ton of tiny little Hershey's bars present so they were ok.

Chocolate Ganache
2/3 cup heavy (whipping) cream
6 oz semisweet baking chocolate, chopped
1 tbsp light corn syrup

Do not make ganache until you are ready to use it, like when you have assembled the cake and the base icing is smooth, or when your donuts are already fried and cooled, etc.

Bring the heavy cream to a boil in a small sauce pot. Remove from heat. Add the chocolate and corn syrup, let sit for a few minutes until chocolate is melting, then whisk until smooth. Pour over cake immediately. Smooth with an icing knife or whatever you can manage.


(sorry the photo's not more glamorous, we'd all had some really delicious white sangria by this point and I couldn't be bothered to mess with manual settings. ha!)

I added 2 layers of caramel cream to the banana cake, at the request of the groom. He approved of the result wholeheartedly. Good thing, too, cause I messed up the first batch of caramel cream so badly it was basically a weak dulce de leche. If I hadn't been so caked out, and if I hadn't had to travel with it, I would've held onto it to make tres leches cake or something. I'll just have to do it again on purpose sometime.

Caramel Cream
1 2/3 cup sugar
1 tablespoon water
3 3/4 cups whole milk
6 tbsp cornstarch
1/2 cup (1 stick) unsalted butter at room temperature
2 tsp vanilla

Measure out the cornstarch into a small bowl. Add 1 cup of the milk to it and whisk until smooth. Measure out the rest of the milk into another bowl. You will not have time to measure things once you have started.

Using a wooden spoon or heat-safe rubber spatula, stir the sugar and water in a small sauce pot over medium-high heat. Stir constantly until it looks like caramel. It will go through phases and will look like sand, gravel, rock candy, etc, and eventually will be liquid and dark brown. Let it get a tiny bit darker than you think it needs, because it will be paler when the milk is added. Do not, at any point, stop stirring. I mean it!
When it's nice and dark amber, remove from heat and add the whole milk (not the starch milk!) in a slow small stream while whisking constantly. Return to heat and add the starch milk while still whisking, a little faster now. When it thickens to a state just below, say, molasses, and has cooled a bit, add the butter and whisk until incorporated. Let cool almost completely before spreading it.

If using this caramel cream between layers of cakes, you will have a ton of leftover caramel, so you might want to bake a batch of brownies and swirl the caramel on top, or some cupcakes and inject it in them or something. Don't waste it!
Also, the cake will need to be refrigerated to let the caramel set before serving it.

Thursday, November 5, 2009

Red Snapper in Miso, plus Spinach and Squash!


As many of you readers know, because you are my friends, I have started telling my friends to invite themselves over for dinner whenever. Surprise surprise, they're taking me up on this. Sunday nights are my favorite nights for dinner guests, because I have so much more time to prepare and really do it up in style. Though, honestly, I think that's starting to happen several nights a week...(invite yourself over!)

Last night my friend Becki came over, and thrilled me with the news that she made my spicy sausage for dinner a few nights ago and loved it. I love positive feedback! I am always so happy to hear that people are enjoying my blog and trying things! Very exciting stuff.

On to the food! I know I don't usually list sides and entrees and all together, but this is one of my favorite meals, and I strongly recommend going for the whole shebang. It's especially great to serve to unsuspecting guests. The moment I put a whole fish on the bone and some chopsticks in front of people, the fun begins. Unfortunately it's the sort of thing I generally make up as I go, so I am doing my best to write it down for you. The recipes below serve 4. You can get all of the ingredients at most grocery stores, and definitely at Asian markets.

White wine works with this, but sake is better, of course. And don't forget, you definitely need rice!


Spicy Miso Snapper
2 whole red snappers, cleaned
1/3 to 1/2 cup red miso paste
1/3 cup nam pla (fish sauce)
1/4 cup sesame oil
2 tbsp rice vinegar
2 tbsp sriracha or more to taste - this is the spicy part!
1/2 cup chopped scallions
3/4 cup water

Cut 3 or 4 parallel slashes into both sides of both fishes, down to the bone. Mix the sauces and scallions in a large bowl. Place both fish in the bowl and spoon the marinade all over the fish, inside too if you want. Set aside while you prep the veggies; more on them later.
Heat a large skillet to medium-high and carefully place both fish in the pan, then add all of the marinade to the pan. Add the water, bring to a simmer, then turn the heat down a little and let the fish cook for about 5 more minutes before turning them over. Use a spatula to look inside the fish periodically. When the flesh is opaque white, serve.

Acorn Squash
1 acorn squash
2 tablespoons brown sugar
2 tablespoons butter, slightly softened

Preheat the oven to 350º. Line a small baking pan with foil. Cut the squash in half and remove seeds. If you want to get fancy, cut little pieces off the bottom of each half so they don't rock and spill the juice while cooking. In a very small bowl, mix the brown sugar and butter until smooth. Smear half of the mix on each half of the squash. Place in the foil-lined pan, cover with more foil, and bake for about 1 hour. Cut into chunks and serve.

Spinach in Sesame Sauce
1 bundle fresh spinach
3 tablespoons sesame seeds
2 tablespoons sesame oil
2 tablespoons sugar
1 1/2 tablespoons soy sauce

Bring water to boil in a sauce pot. Mix the seeds, oil, sugar, and soy sauce in a small bowl. Boil the spinach for about 30 seconds, strain, and return to the still-hot pan. Add the sauce mix, stir well and serve immediately.

Wednesday, November 4, 2009

Carrot Cake


I have still been practicing for mom's wedding cakes, I just haven't been blogging about it. I have switched to cupcakes, though, to test (and hone) my icing skills and tweak the recipes til they're just right. I mean, you only get to make your mom's wedding cake once...one assumes. (Kidding, mom!) The wedding is THIS weekend, and I am very very excited!

Anyway, this carrot cupcake was from the batch I made for my friend Angelo's birthday, and if you scroll down you'll see a different version of this recipe, which is less rich, with no brown sugar and no dates or walnuts inside, so don't worry about that one. If you're really into texture in your carrot cake, go nuts (ha!) with more walnuts, pecans, coconut and maybe some raisins. Just be sure to chop stuff up a bit, k? K.

Carrot Cake

2 1/4 cups flour
1 1/2 tsp baking powder
1 1/2 tsp baking soda
3/4 tsp salt
1 1/2 cups vegetable oil
4 large eggs
1/2 cup brown sugar (I always use dark, for everything.)
1 1/2 cup sugar
2 tsp ground cinnamon
1/2 tsp ground nutmeg
1/4 tsp ground clove
3 cups grated carrots
1/2 cup finely chopped dates

Preheat the oven to 350º. In a medium bowl, whisk together the flour, baking soda, salt, and spices. Set aside. In a large bowl, beat the sugars and eggs with a hand mixer on medium speed until frothy, about 20 seconds. Add the oil in a steady stream and beat another 20 seconds. (The steady stream part is easier if you have a standing mixer, but I find pouring it in slowly with one hand and holding the hand mixer with the other works just fine.) Add the wet mixture to the dry mixture. Stir in the carrots and dates, then pour into pans and bake in the center of the oven. Cupcakes should be about 25 minutes, 9" round cakes should take about 35 minutes. As with all cakes, bake until a toothpick inserted in the center comes out clean.


Cream Cheese Icing

2 8-oz bars of cream cheese
1 cup (2 sticks) of unsalted butter, softened but still cool
2 tsp vanilla
3 cups confectioners' sugar
2 tbsp whole milk

Beat the cream cheese and butter with a hand mixer until smooth. Beat in the vanilla and milk, then the sugar one cup at a time. You may not need all 3 cups, and you may need more, so be prepared.

Apple Cider Donuts


My friend Haley recently got married in Vermont, and while I was there for the wedding I had my first-ever apple cider donut. I was instantly hooked, of course, and had to try making them myself as soon as I had time - which was yesterday. I think the best thing about these donuts is that they're as quick as biscuits or pancakes, but look soooo much more decadent.

Overall, the recipes I read online called for about a cup less flour than my recipe below. I found the dough impossible to work with without this added flour, very loose and wet. See how it goes for you, add the last cup gradually. The temperature of the oil is important, if too hot the outside of the donuts will be dark brown and the middles will still be doughy. If too cool, the dough gets oil-logged and crispy (which isn't such a bad thing, when it's only a little). If you don't have a thermometer (I don't), you can test the oil temperature using donut holes. The oil is the right temperature when a donut hole cooks slowly, taking a minute or two before getting gold around the edges.

Also, if you don't have a donut cutter, you can use a large cookie/biscuit cutter and a shot glass or jigger to cut out the middle. (I have this one, and it's great for donuts or for cutting the center out of sliced pineapple!)

Apple Cider Donuts

1 cup apple cider
1 cup sugar
1/4 cup shortening
2 large eggs
1/2 cup buttermilk
4 1/2 cups all purpose flour
2 tsp baking powder
1 tsp baking soda
1/2 tsp salt
3/4 tsp cinnamon
1/2 tsp nutmeg

Apple Cider Glaze
1/2 cup apple cider
2 to 3 cups confectioners' sugar

Boil the apple cider in a small sauce pot until reduced by half, about 9 minutes. While it is cooling, whisk together the dry ingredients (minus one cup of flour!) in a bowl. Set aside. Start heating your frying oil to 375º.

In a large bowl, beat the sugar and shortening until fluffy, then beat in the eggs, then the buttermilk, then the cooled reduced cider. Add the dry ingredients and stir with a wooden spoon until incorporated, adding the additional cup of flour as needed. The dough should feel like loose biscuit dough, too tough is bad but you have to be able to handle it without it falling apart.

Move the dough to a floured surface and pat out to 1/2" thick. Cut into donuts & holes and fry a couple at a time. Donuts should be flipped when the sides are golden, holes should be rotated as needed to brown evenly. Remove from oil and drain over paper towels, then dip or drizzle with glaze.

To make the glaze: whisk cider and confectioners' sugar until smooth. That's it!

Wednesday, October 28, 2009

Spicy Sausage Rigatoni


You haven't seen much savory stuff here in a while, I know. I didn't think anyone was on to me but I got an email this morning from a reader (hi!), and I can't help but fulfill the request promptly, considering how seldom I get emails from this blog. And I was already halfway through typing up the carrot cake... Oh well!

One of my best friends was brave enough to move into an apartment around the corner from mine. I say brave because everyone who lives close enough to eat with me daily ends up puttin on a little weight...but it's not my fault! Portions, people! Anyway, this friend has developed a habit of coming over for dinner as often as possible (shock!). Fortunately, he has also developed a habit of bringing ingredients. Sometimes it's a couple of things I forgot to pick up at the store, and sometimes it's, "Surprise! It's sausage night!" And that is how this recipe came to be.

Luckily I keep a stash of various kinds of canned tomatoes, pastas, fresh herbs, and cheese handy, so that sausage was a good surprise. I went for rigatoni mostly because the other options were shells or lasagna, and I put sherry in the sauce because I can't help but put sherry in everything. (If you don't have any, go buy it. Then put it in every meat, fish, or mushroom dish you make, and you will thank me.) Sherry just might be my official favorite ingredient this year.

I didn't have as many fresh herbs on hand as I would've liked, but the sauce is lovely with just thyme. This recipe serves 3, or 2 if one has a bottomless stomach. It's also pretty fast, like, light speed compared to most of the stuff I cook!

Spicy Sausage Rigatoni
3 or 4 links spicy Italian sausage
about 1/2 a box of rigatoni
1 tsp olive oil
1/4 cup sherry
4 cloves of garlic, minced
1 15-oz can plain tomato sauce
1 15-oz can diced plum tomatoes
2 tbsp tomato paste
3 branches worth of fresh thyme (about 1 tsp)
salt to taste
1/4 tsp black pepper
parmesan, romano, or asiago cheese for garnish

Measure out the amount of water needed according to the pasta box, and bring it to a boil. Place the sausage links carefully and boil until fully cooked. Remove the sausages with tongs but leave the water, you will cook the pasta in it momentarily, and it will be delicious.

In another sauce pot, sautée the minced garlic in olive oil over medium-high heat until fragrant, then add the sherry. When the noise stops, add the tomato sauce, diced tomatoes, tomato paste, thyme, salt and pepper. Stir well and bring to a boil, add a little water if it looks too solid. Turn heat down to medium and let simmer, stirring often. Slice the sausages about 1/4" thick and add them to the sauce. You should probably start the pasta around this time.

When the pasta is drained and ready, remove the sauce from heat and stir in some cheese. Serve over pasta immediately, preferably with some garlic bread and red wine. And more cheese on top, obviously.

Thursday, October 22, 2009

Baby Portobello & Black Bean Soup


I can't help but brag: My friend Jesse and I are a pretty stellar team in the kitchen. Whenever we have cooked together, we have found that we have the same instincts about what needs to be added and when. The results are always delicious, and sometimes we even manage to write down what we did. Go team!

This soup arose from a sale on baby bellas at freshdirect.com, where I tend to do my grocery shopping, and a new stainless steel stock pot I bought this week and was just dying to use. The seasoning was all her, but I take credit for the black beans. I strongly recommend trying this, immediately. I think I'm adding it to my Thanksgiving menu.


Baby Portobello & Black Bean Soup

2 16-oz packages baby portobello mushrooms, quartered
1 white onion, chopped
3 cloves garlic, finely chopped
3 tbsp butter
4 tsp black pepper
2 tsp salt
1/2 tsp basil
1/2 tsp parsley
7 stems fresh thyme
1/3 cup sherry
1 tbsp Worcestershire sauce
3 cups water
1 15-oz can organic black beans
1/2 cup organic sour cream
3 to 4 cups whole milk

In the bottom of a stock pot, sautée the mushrooms, onion, and garlic in butter (or olive oil) until the onions are clear. Add sherry, wait for the sizzle to slow, then stir in herbs & Worcestershire sauce. Add the water and simmer over medium heat about two hours, uncovered. Remove from heat and pour soup into a blender, add black beans, and pulse until only small chunks remain. Return to the pot and stir in sour cream & milk over low heat. Add salt & black pepper to taste.

Serve with crusty bread and a dollop of sour cream. Cilantro would probably also be really good on top.


Sunday, September 13, 2009

Blueberry Lemon Tart


I've been using this crust a lot this summer, because people love it so much. I'll probably find a dozen new ways to fill it as the fall goodies come into season. This version was made for a 14-person dinner party some friends of mine and I threw at my apartment a couple of weeks ago. I thought the tart had all been eaten before anyone got a photo, and just got this photo today. Good thing, too, cause now I can share the recipe with you, internets.


Shortbread Pastry Tart Crust

1 3/4 sticks of unsalted butter, slightly softened
1/3 cup confectioner's sugar
1 egg yolk
1 1/4 cup flour
1 tablespoon buttermilk*

In a medium or large bowl, mix the butter and sugar with a hand mixer on low. Add the egg yolk and beat in until combined, then mix in half of the flour. Add the other half of the flour, then the buttermilk. Lay a cookie-sheet-sized sheet of wax paper out and dump the dough onto the center of it. Place another sheet of wax paper on top and flatten to about 1/4" thick. Set this on a cookie sheet and freeze for about 20 minutes.
Remove the dough from the freezer and let it rest a minute before peeling off one layer of paper. Gently roll the dough around a rolling pin and remove the backing, then carefully unroll it over the tart pan. Press it into place and put it back in the freezer for an hour. Preheat the oven to 350º. Bake the tart in the middle of the oven for 20-25 minutes or until golden around the edges. I remove it from the oven halfway through and press a round cake pan into it to create a nice shape. (This can also be achieved with pie weights, or by lining the tart with parchment or aluminum foil and filling it with uncooked rice.) While the tart shell is baking, start the lemon curd. When the shell is lightly browned around the edges, remove from the oven but do not turn it off. Let cool 5 minutes or so before filling.

Blueberry Lemon Curd
grated zest of two lemons
2/3 cup sugar
1/4 cup lemon juice
4 tbsp (1/2 stick) butter at room temperature
2 large eggs
pinch of salt
about 1 1/2 cups blueberries

Bring about 1" of water to not-quite-simmering in a sauce pot. In a metal bowl, mix the lemon zest, sugar, and butter, blending with a hand mixer until creamy. Add the eggs one at a time. Mix in the lemon juice and salt, then place the bowl over the [almost] simmering water with the heat on low. Stir continuously with a wooden spoon until the curd has thickened enough to coat the back of the spoon, about ten minutes, then remove from heat.
Pour the curd into the tart shell and smooth it out. Cover the top entirely with blueberries. Place in the center of the oven and bake until the blueberries begin to burst and the crust browns. Refrigerate at least one hour before serving so the curd can solidify.

Monday, September 7, 2009

double vanilla cupcakes with strawberries


Earlier today I made a variation of my favorite chocolate cake recipe, substituting Nutella for the cocoa powder (I was out of the latter and am always up for an experiment!). It was a disaster. The cupcakes didn't rise, but kinda blobbed, and all present agreed it was an epic cupcake fail. What a shame, too, because chocolate nutella cupcakes with coconut flakes inside would be really good. I'll have to work something out in the future.

So, still craving cupcakes, I made these, which are the opposite. Simple as simple can be, a vanilla cupcake with vanilla buttercream and a strawberry is so fresh and light you want to eat 3 at a time. Or so I'm told.

Vanilla Cupcakes

3/4 cup butter at room temperature
1 2/3 cups sugar
2 large eggs at room temperature
2 2/3 cup all purpose or cake flour
1 1/2 tsp baking powder
1/4 tsp salt
3/4 cup + 2 tbsp milk
2 tsp vanilla extract

Preheat the oven to 350º. In a large bowl, beat butter until smooth, then beat in sugar until fluffy. Beat in the eggs one at a time, scraping the bowl in between. In a medium bowl, whisk together the dry ingredients and set aside. Stir the vanilla into the milk in a bowl, set aside. Mix 1/3 of dry ingredients into the butter mixture, then 1/3 of the vanilla milk, and repeat until all are combined. Spoon into 24 cupcake cups and bake for 20-25 minutes.

Vanilla Buttercream

1 1/2 cups (3 sticks) unsalted butter, softened
2 tsp vanilla extract
1 to 1 1/2 cup confectioner's sugar
2 tsp milk

In a medium bowl, beat the butter until creamy, then beat in the confectioner's sugar. Add the vanilla and milk, beating until combined. Add more confectioner's sugar as needed to thicken to your desired consistency.

Tuesday, August 18, 2009

Chocolate Raspberry Tart


(I might have a better image on another computer, sorry for the blur!)

Another birthday, another tart. Actually, there were two birthdays in my circle last week, but the peanut butter chocolate cake has already made an appearance on this blog. There's a carrot cake coming really soon, I have promised it to someone. Good thing, too, I still don't think I've had enough practice for mom's wedding!

The tart crust is based on a basic French pastry crust, and maybe it still is that, but I switched from heavy cream to buttermilk and it turns out somewhere between pastry and shortbread. And I am pretty sure I've been slightly under-cooking it. Whatever I've been doing, it's been delicious, so you should try it - with whatever filling you want. The first time I made this shell, I filled it with caramelized thin-sliced fuji apples. I didn't get a chance to photograph that one. These things happen often when it comes to desserts...

Shortbread Pastry Tart Crust
1 3/4 sticks of unsalted butter, slightly softened
1/3 cup confectioner's sugar
1 egg yolk
1 1/4 cup flour
1 tablespoon buttermilk*

In a medium or large bowl, mix the butter and sugar with a hand mixer on low. Add the egg yolk and beat in until combined, then mix in half of the flour. Add the other half of the flour, then the buttermilk. Lay a cookie-sheet-sized sheet of wax paper out and dump the dough onto the center of it. Place another sheet of wax paper on top and flatten to about 1/4" thick. Set this on a cookie sheet and freeze for about 20 minutes.
Remove the dough from the freezer and let it rest a minute before peeling off one layer of paper. Gently roll the dough around a rolling pin and remove the backing, then carefully unroll it over the tart pan. Press it into place and put it back in the freezer for an hour. Preheat the oven to 350º. Bake the tart in the middle of the oven for 20-25 minutes or until golden around the edges. I remove it from the oven halfway through and press a round cake pan into it to create a nice shape. (This can also be achieved with pie weights, or by lining the tart with parchment or aluminum foil and filling it with uncooked rice.) Let cool mostly before filling.

Chocolate Raspberry Tart Filling

8 oz baking chocolate, chopped
3/4 stick unsalted butter
pinch of salt
dash of vanilla
2 tablespoons agave nectar or corn syrup
1/3 to 1/2 cup rasbperry jam (or any other flavor)

In a double boiler with barely simmering water, melt the chocolate, butter and agave nectar.
Spread the jam around the bottom of the tart shell, then slowly, gently pour the chocolate over it as evenly as possible. It helps to pour in a circular motion and spread it with a rubber spatula.
Assemble raspberries on top.
Set in the fridge or freezer to set.

*milk + lemon juice = you don't have to buy buttermilk.

Wednesday, July 15, 2009

Banana Cake with Nutella Buttercream


After a while you get sick of making banana bread all the time. Since I'm baking a lot of cakes this summer to get practice for my mom's wedding cake in a few months, I decided to turn my overripe fruit into cake for a change. Just another step in my self-imposed cakemaking bootcamp.

It probably wouldn't be a bad idea to play with the butter-to-Nutella ratio in the icing, let me know if you do.

Banana Cake
2 1/2 cup flour
5 tsp baking powder
1 cup sugar
1 cup brown sugar
4 eggs
4 ripe bananas, slightly mashed
3/4 cup butter, at room temperature

Preheat the oven to 350º.
Beat bananas with a hand mixer (because it's more fun than using a fork). In a separate bowl, beat sugar, eggs, baking powder, and butter at medium speed about four minutes until fluffy. Add banana mush, beat 30 seconds. Sift flour over the mixture and beat in at low speed for 30 seconds. Pour into two 8" round greased cake pans and bake in the center of the oven for about 40 minutes or until a toothpick in the center comes out clean. Let cool completely before assembling.

While the cake is cooling, make the buttercream.


Nutella Buttercream Icing

1 1/2 cups (3 sticks) butter at room temperature
1 cup Nutella
pinch of salt
2 cups confectioners' sugar
1/2 tsp milk (or more as needed)

In a medium bowl, cream butter and nutella until smooth. Add salt and sift the powdered sugar over the butter mixture, beat in until smooth. Add the milk and beat at high speed until fluffy. Add more milk or powdered sugar if needed to achieve the thickness you want.

Friday, July 10, 2009

Black Forest Cake


This is all that remained of the cake after Blaine's birthday, and it was all I could do to smuggle it out of the bar to get a photo. He asks for black forest cake every year, but last year I made it with canned cherry pie filling, and this year I used fresh cherries and even bought myself a new toy for removing the pits.
If you want a darker icing, you can get fancy and melt a square or two of semisweet baking chocolate and add it to the butter *after* the chocolate has cooled to room temperature. Use a double boiler or microwave according to the package to melt it, otherwise you'll burn it! Chocolate burns easily and tastes like tree bark when it does. I have tested this theory dozens of times.

This is the same cake recipe as the chocolate mint cake a few months back, only I left out an ingredient (the milk!) on the original post. Sorry! This version of it is complete, and has the added bonus of delicious drunken cherry syrup to make it nice and moist. It got rave reviews at the bar party. :)


Drunk Cherry Syrup
4 cups fresh dark cherries, pitted and sliced in half
2/3 cup sugar
1/2 cup water
2 tbsp + 2 tsp cornstarch
1/4 cup kirschwasser or cherry vodka

In a medium bowl, coat the cherries with sugar and a sprinkle of water. Cover with plastic wrap and let sit at room temperature for an hour or two until there is juice in the bottom of the bowl. Set in the fridge overnight to continue juicing. The next day, while the cake is in the oven, pour the juice into a small sauce pot over medium heat. Add the water and cornstarch and bring to a simmer, stirring constantly until clear and thickened. Set on a wire rack to cool. When cooled, pour about 2/3 of the glaze into a bowl and whisk in the kirschwasser. Use this, the boozed up portion, to pour into the cake layers later. The un-spiked portion of the glaze can be poured on top of the cherries on the top of the cake.

Black Chocolate Cake

1 3/4 cups all purpose flour
2 cups sugar
2/3 cup cocoa powder
1 1/2 tsp baking powder
1 1/2 tsp baking soda
1 tsp salt
6 tbsp butter
2 1-oz squares unsweetened baking chocolate
2 eggs
2/3 cup milk
2 tsp vanilla extract
1 cup boiling strong coffee

In a sauce pot on medium heat, melt the baking chocolate and butter, stirring often. If it starts to bubble, turn down the heat or it'll burn. Set aside and let cool.
Heat oven to 350º and grease two 9" round cake pans.
In a large bowl, whisk together the flour, sugar, cocoa powder, baking powder, baking soda, and salt. Add eggs, milk, buttery chocolate, and vanilla and beat with a hand mixer on medium for about 2 minutes. Scrape the sides of the bowl with a spatula, add the boiling coffee and stir it in. Pour into cake pans and bake for 30-35 minutes or until a toothpick inserted in the middle comes out clean. Let cool 10 minutes before removing from the pans and letting cool completely on wire racks.


Chocolate Buttercream Icing
1 1/2 cup (3 sticks) butter at room temperature
1 1/2 to 2 cups confectioners' sugar
1/3 cup cocoa powder
3 to 6 tbsp milk
2 tsp vanilla
pinch of salt

In a medium or large bowl, beat the butter with a hand mixer until smooth and creamy. In another bowl, whisk together 1 1/2 cups of the confectioners' sugar, the cocoa powder, and salt, then add to the butter along with the vanilla, and 2 tsp of the milk. Mix until combined. Add more confectioners' sugar, milk, or cocoa as needed to get the consistency/chocoholic level desired.

To Assemble:
Place a glob of icing on the cake plate, lay one layer of cake on it. Pour half of the drunk cherry glaze into the first layer, then cover with icing, then a layer of cherries. Place the second layer of cake on top of the cherries, pour the drunk cherry glaze, then icing, then cherries, then glaze.

Saturday, June 13, 2009

Curd-Filled Lemon Cupcakes


While in London on a business trip a couple of weekends ago, I had a lemon cupcake with my afternoon tea and was thrilled to discover a surprise. Not only was this a delicious lemony cupcake with lemony buttercream, but it also had a lemon curd filling. It went beautifully with my extra-super-bergamot-flavored Earl Grey, and I promised myself I'd attempt to recreate them when I got back to my kitchen. So I did.

One of my friends, who has had many, many of my baked goods over the past few years, said these are the best cupcakes I've ever made. I think he's right, though I may top these with my birthday cupcakes next week....aren't you excited?

Make the lemon curd first, so you'll have it handy when you're ready to put some of it into the cake and into the icing. Instead of carving plugs out of the cupcakes and filling them, you can use a pastry bag to squeeze the curd into them. I think carving's more fun. You MUST use fresh squeezed-it-yourself lemon juice, the bottled concentrate stuff is horrible and will make horrible cupcakes.


Curd-Filled Lemon Cupcakes

For the Curd:
grated zest of two lemons
2/3 cup sugar
1/4 cup lemon juice
4 tbsp (1/2 stick) butter at room temperature
2 large eggs
pinch of salt

Bring about 1" of water to not-quite-simmering in a sauce pot. In a metal bowl, mix the lemon zest, sugar, and butter, blending with a hand mixer until creamy. Add the eggs one at a time. Mix in the lemon juice and salt, then place the bowl over the [almost] simmering water with the heat on low. Stir continuously with a wooden spoon until the curd has thickened enough to coat the back of the spoon, about ten minutes, then remove from heat.
Set aside 1/3 cup of curd to go in the icing, and 1/2 cup to go into the cake batter. The rest is for filling.

For the Cupcakes:
1 1/4 cup all-purpose flour
3/4 tsp baking powder
1/4 tsp baking soda
pinch of salt
1/2 cup butter at room temperature
1 cup sugar
1 tbsp lemon juice
2 tsp lemon zest
1 tsp vanilla
1/4 cup sour cream
3/4 cup buttermilk*
1/2 cup lemon curd
2 eggs at room temperature

*or, 3/4 cup milk with a tbsp of lemon juice in it, let it sit and curdle for 5 minutes or so before use.

Preheat oven to 350º.
In a medium bowl, whisk together the flour, baking powder, baking soda, and salt, set aside. In a large bowl, beat the butter with a hand mixer until smooth and fluffy. Add the sugar, beating until fluffy, then add lemon juice, zest, and vanilla. Mix in 1/3 of the flour, then half of the milk, then another 1/3 of flour, then the sour cream, then the rest of the milk, and then the last of the flour. Pour into paper-lined muffin tins, each one should be around 2/3 full.
Bake for about 25 minutes or until lightly browned around the edges, and let cool completely before filling and icing them.

For the Icing
1/2 cup unsalted butter at room temperature
1/3 cup lemon curd
1 tsp lemon juice
2 to 4 tbsp milk
1 to 1 1/2 cup confectioners' sugar
1 tsp vanilla

Cream the butter in a small bowl with a hand mixer. Add the lemon curd, lemon juice, and vanilla and beat until combined. Add 1 cup of confectioners' sugar, mixing to combine, and add milk and/or confectioners' sugar until it is the texture you like.

When the cupcakes are cool and the icing and curd are ready, cut a circle out of the center of hte top of the cupcakes (think half a wine cork) and remove the cake. Drop about 1 tbsp of lemon curd into the cupcakes and replace the cake-plug. Cover with icing to hide the seam, and place shaved lemon peel on top for garnish.

I recommend freezing a few of these, because you will want them again very soon after the first round, and not want to go to the trouble again so soon.

Thursday, June 11, 2009

Steak & Potatoes


You'll be surprised how easy this is to make. It's about 10 minutes of prep time, really, unless you're a slow potato-chopper. The potatoes recipe kinda came to me as I walked to the grocery store, all I could think was potatoes and goat cheese. It just so happened that I had some whipping cream I needed to use up and the thyme (among other things) I planted in the early spring was finally ready to be plucked and used, and there is nothing like fresh home-grown thyme picked off the plant moments before going into the pan. I can't wait for the basil and rosemary to be big enough to use! There's some spinach that's only a few days away from meeting its fate under some balsamic vinegar...

Sherry Steak

3 steaks of your preference
1/3 cup sherry
4 to 6 cloves of garlic, crushed and chopped
1 tsp mustard powder
salt
black pepper

Let the steaks come to room temperature. Rub both sides with salt and black pepper. In a medium bowl, whisk the sherry, mustard, and garlic. Put the steaks into the bowl and be sure they're coated with the marinade. Let sit for an hour while you cook the potatoes.
Heat your skillet or iron grill for several minutes before spraying with a little cooking spray or sprinkling a little olive oil on it. If it sizzles, add the steaks all at once, flip after 3 minutes, and remove from heat. Serve immediately.
If desired, mix the remaining marinade with some butter or worcestershire sauce and bring to a simmer briefly before pouring over the steaks.

Goat Cheese Potatoes with Thyme
3 large-ish potatoes, washed and slightly peeled
4 oz goat cheese (with herbs already in it is nice but not necessary)
3/4 to 1 cup heavy whipping cream
4 cloves of garlic, crushed and chopped
1 to 2 tsp olive oil
1/2 tsp black pepper
salt to taste
1 tbsp fresh thyme leaves

Preheat the oven to 375º. In a sauce pot, mix the goat cheese and heavy cream over low heat, stirring to combine. As soon as the goat cheese is dissolved in the cream, remove from heat and add the garlic, olive oil, salt, pepper, and thyme.
Slice the potatoes around 1/4 to 1/8" thick. Spread a tablespoon or two of the goat cheese mixture in the bottom of a round baking dish and cover with a layer of potatoes. Repeat until the dish is full, finishing with a slightly more generous layer of cheese on top. Cover with foil and bake for about an hour, removing the foil toward the end for some light browning.

Serve with toasted challah if you've got it.

Monday, June 8, 2009

Challah!


When I first moved to New York, I lived in a Victorian house with 5 roommates, most of whom were Jewish girls, one of whom was kind enough to call her grandma and get the family recipe for challah for me. I have tested a handful of other challah recipes in the years since then, but none of them do it for me. One of the best parts of this recipe is that it makes two gigantic loaves without much effort, and they're really soft and tasty. The other best part is that it's great for French toast or bread pudding when it's stale, which is a total bonus.

Challah


3 packages (6 1/2 tsp) active dry yeast
2 1/4 cups warm water
1/2 cup sugar
1 1/2 tbsp salt
1/2 cup melted butter
3 eggs + 1 egg for the wash
7 1/2 to 8 cups bread flour or all-purpose flour
oil for greasing the bowl

Stir together the yeast, water, and sugar in a very large bowl and set aside to react. After five minutes or so, when it's nice and foamy, add the salt, butter, and eggs and stir to combine. Add the flour one cup at a time. Once all the flour is incorporated, continue to knead for about ten minutes, outside of the bowl. Seriously. Kneading it for a long time is a good thing. This is what makes it soft.

Coat the inside of that giant bowl with oil and place the dough in it, cover with plastic wrap, and let rise until doubled, about 1 1/2 to 2 hours.
Remove the plastic wrap and punch the dough down and knead it briefly, then divide in half. Divide the two pieces into four, two slightly larger and two slightly smaller. Divide each of these pieces into 3 and knead/roll into thick ropes about 15" long. Take 3 small ropes and pinch them together at one end. Braid the dough, pinch the other end, and turn both ends under. Repeat with all of the dough until you have 2 large braids and 2 small braids. Set the small ones atop the large ones and place each loaf on a greased cookie sheet. Cover with plastic wrap and let rise until doubled, about 45 minutes to 1 hour. At the halfway-risen point, start preheating the oven to 400º.

Beat an egg and brush the loaves with it before putting in the oven. Bake at 400º for ten minutes then turn down to 350º and bake another 30 to 40 minutes or until golden brown.

Tuesday, June 2, 2009

Chocolate Chip Cookie Bars (Or Giant Cookie)


These are so fast and easy, and the batch is surprisingly large. When I'm pressed for time and want something sweet, I always make these or brownies. We're talking 15 minutes prep time, 20 minutes baking, and you've got 4 dozen cookie bars. I don't recommend making them unless you've got people coming over to help eat them, but I do recommend serving them warm with ice cream.

Chocolate Chip Cookie Bars
2 1/4 cups all-purpose flour
1 tsp baking soda
1 tsp salt
1 cup (2 sticks) butter, softened
3/4 cup sugar
3/4 cup dark brown sugar
1 tsp vanilla
2 large eggs
2 to 2 1/2 cups chocolate chips

Preheat the oven to 375º and grease a large cookie sheet (jelly roll pan).
In a small bowl, whisk the flour, baking soda, and salt.
In a large bowl, beat the butter, sugars and vanilla until smooth and creamy. Beat in the eggs one at a time, then gradually beat in the flour mixture. Stir in the chocolate chips and spread into the cookie sheet.
Bake for 20 to 25 minutes or until lightly golden. Cool at least 5 minutes before cutting, but the longer you wait the prettier they are.

Tuesday, May 12, 2009

Cinnamon Raisin Bagels


I recently made a new friend who was silly enough to think she could say "I want to learn to make bagels" and not be dragged to my house and apronned. (If the act of putting an apron on a person isn't a verb, it should be.) She was thoughtful enough to bring another friend with her, and so, over the making of these bagels we new friends bonded. Awwwww. We also got a lot of flour all over ourselves.

It's basically the same recipe as the everything bagels I posted in January. If you want photographic references for the process, check them out here: Everything Bagels.

Cinnamon Raisin Bagels

4 cups bread flour or all-purpose flour
2 tsp salt
1 tbsp barley malt syrup
1 1/2 tsp instant yeast
1 1/4 cups warm water
1/2 tsp vanilla
2 tbsp cinnamon
1 1/2 cups raisins
1 tbsp honey

In your largest mixing bowl, combine the flour, barley malt, and salt with a pastry cutter. In a small bowl, add the yeast and vanilla to the water, stir well, then pour into the flour mixture. Stir with the pastry cutter until the dough becomes too dense to stir, then start kneading it into dough, rotating the bowl as you go. It will take several minutes for the dough to become smooth, and once it is smooth keep kneading for at least 4 more minutes. Knead in the raisins (good luck!).

Separate your dough into 8 pieces. Roll each piece into a ball then roll each ball out to a 'snake' about 11" long. Shape the dough into a circle and pinch it together with 1-1/2" dough-overlap. Again, this will not be easy. You can put your hand in the middle of the bagel and knead the seam under your palm.

Set the rolled bagels on a cookie sheet, cover with plastic wrap, and refrigerate for several hours or overnight. They will rise slowly in the fridge, which is what gives them that wonderful texture inside.

12 to 18 hours later, preheat the oven to 425º.

Boil a quart or two of water and the honey in a wide deep pot (I use my wok). It should have room for 4 bagels in it at a time. Take the bagels out of the fridge and set them on the counter to relax while you wait for the water to come to a full rolling boil. Now might also be a good time to get out the wire cooling rack to rest the bagels on after boiling.

Carefully place 4 bagels at a time in the water. Boil them for about 30 seconds, dunking them with a slotted spoon from time to time. Remove them from the water to the cooling rack, let drip for a minute before placing the bagels on the cookie sheet. Bake for about 14 minutes, or until you start to see a hint of browning on top.

Monday, May 4, 2009

Chocolate Fudge Cookies


These are even more moist and chewy than they look. When they first come out of the oven, they're still really doughy in the middle and if you eat them while they're still hot they are molten chocolate lava in the middle. As they cool it's more manageable, and by the time they've come to room temperature they're dense and brownielike. Are you drooling yet? Maybe I'll go make another batch...

Chocolate Fudge Cookies


2 slightly-overfull cups all purpose flour
1/2 cup cocoa powder
1/2 tsp baking soda
3/4 tsp salt
1 1/2 sticks butter, melted and cooled to warm
1 cup packed brown sugar
1/2 cup white sugar
1 large egg + 1 egg yolk
2 tsp vanilla
1 to 2 cups chocolate chips

1) Preheat the oven to 325º with racks in the middle and upper-middle positions.
2) Whisk the flour, cocoa powder, baking soda, and salt in a small bowl and set aside.
3) Mix the butter and sugars in a medium bowl. Add the vanilla and eggs and beat until just combined.
4) Add the wet ingredients to the bowl of flour and beat until just combined. Stir in the chocolate chips. (Personally I feel like less is more in these cookies.)
5) Drop lumpy tablespoonfuls on a cookie sheet, at least 2" apart. Bake for 12 to 15 minutes or until somewhat solid-looking around the edges. If the middles start to look solid, pull them from the oven immediately or you'll spoil the best part.
Let them cool on the cookie for at least 5 minutes before trying to move them, they will still be raw in the center when they come out of the oven. They will continue baking themselves as they cool. Clever little cookies!

Sunday, May 3, 2009

Japanese Curry with Mushrooms, Tofu, Carrots, and Onions


Ok ok, so, this isn't from scratch. The sauce comes in a box and I have no idea what's in it but if I find a recipe for it (not that I've looked) I promise I'll try making it from scratch. In the meantime, I don't feel guilty at all including this dish in my blog because it does take a bit of prep work and it still counts as cooking. Besides, I want everyone I know to know how good and easy this is...not to mention cheap. You can eat for days off of a batch of this stuff, and it only gets better after a stint in the fridge.


This is what the box looks like. It co mes in mild, medium, and hot, but the hot seems pretty mild to me and I'm a total wuss when it comes to spicy things. Another note, my friend Richard who brought Japanese curry into my life always puts shredded sharp cheddar on top while it's still really hot, and serves it with both chopsticks and a spoon. He used to live in Japan, so I take his word for it that it's the right way. Give it a shot, I bet you'll like it. Sadly, I happened to be out of cheddar the day I made the batch in the photo.


Japanese Golden Curry with Mushrooms, Tofu, Carrots, and Onions

2 tbsp olive or vegetable oil
1 medium onion, cut into chunks
1 to 2 cups shitake mushrooms, stemmed
1 block of extra firm tofu, drained on paper towels and then cubed.
1 huge Asian carrot or 3 to 5 normal carrots, chopped into 1/4" discs
3 cups water
1 box of Golden Curry mix

Start your rice.
In a large skillet, sautée onion and mushrooms in oil until lightly browned, about 3 minutes. Add the tofu, carrots, and water and simmer for about 20 minutes over medium-low heat. Add the curry mix and stir until dissolved. Let simmer another 5 minutes before serving over rice.

Yes, it's that easy.

Saturday, May 2, 2009

Baked Breaded Catfish with Parmesan


When I got back from a vacation in Belize this time last year, I was addicted to fish and looked up a ton of recipes, more than I could possibly make in a month, and tucked them away. This is one of those, and is so easy and so good that the first time I made it, I made it again the next night. There are witnesses. It goes really well with corn bread or couscous or roasted potatoes, and spinach sauteed in garlic mixes with it quite nicely, in case you were wondering. It doesn't even need the cheese, really, but I can't help but add cheese to things. It's not the worst habit a girl could have.

This recipe takes about 5 minutes of prep work and is done baking before you know it. 2 large fillets serves 3 to 4 people, depending on the fillets and the people. You can use seasoned breadcrumbs if you prefer, but the pre-seasoned breadcrumbs tend to be Italian and that gives a different feel to the dish. Tasty, though, I'm sure. Also, if you have grated parmesan instead of shredded, you can mix it in with the breadcrumbs at the beginning.

Yes, that's sweet potato cornbread in the picture.

Baked Breaded Catfish
1/2 to 3/4 cup plain breadcrumbs
1/4 tsp garlic powder
1/3 cup lemon juice
3 tbsp olive oil
2 large catfish fillets
1 tbsp paprika
1/4 cup shredded parmesan

Preheat oven to 400º. Generously grease a baking pan (I prefer glass for fish) and set aside.
In a shallow dish, combine the breadcrumbs and garlic powder. In another shallow dish (or on a plate), stir the lemon juice and olive oil together. Coat both sides of each fillet with the oil mixture and then lay both sides in the breadcrumbs, making sure to coat evenly. Lay them in the prepared pan and sprinkle with the paprika and parmesan.
Bake in the middle of the oven for 10 minutes. Reduce the heat to 350 and bake another 8 to 10 minutes.

Sweet Potato Cornbread

For the past couple of years, I lived around the corner from a soul food buffet restaurant. I didn't eat there very often (why didn't I? Because I am an idiot!), but when I did I was always sure to get a big ol' hunk of their sweet potato cornbread, because it was unlike any other thing I've ever had. This recipe is nowhere near as good as theirs, but it's still walking distance from my new place and I may just have to go over there and get some and see if I can work out what they did differently. Three times more sweet potatoes, or honey, or some molasses maybe? I wouldn't be surprised. I'll let you know if I figure it out.

Don't get me wrong, this sweet potato cornbread still thrills me. Everyone who had a piece of this batch was pretty pleased with it, one of my friends even vowed to write a poem in its honor. But if you live in Bushwick and know the soul food place on Broadway, it may let you down a little. I, for one, am totally spoiled.

Sweet Potato Corn Bread

3 sweet potatoes
3 tbsp butter
1 cup all purpose flour
1 cup corn meal
1 tbsp brown sugar
1 tbsp baking powder
1/2 tsp baking soda
1 tsp salt
1/4 tsp cinnamon
pinch of clove
1 1/4 cups buttermilk*
2 eggs, lightly beaten

Fill a small sauce pot about 3/4 with water and bring to a boil. Peel and cut the sweet potatoes into chunks. Add them to the boiling water and cook about 20 minutes, then remove from heat and drain. Add butter, then mash with a potato masher or pulse in a food processor until fluffy. Transfer to a medium bowl and let cool to room temperature.
While it's cooling, preheat the oven to 400º. Grease a 9x9" baking pan and set it aside.
In a small bowl, whisk together the flour, corn meal, sugar, baking powder, baking soda, salt, cinnamon and clove. Mix the buttermilk and eggs into the bowl with the sweet potatoes, then add the dry ingredients and mix until just combined and a little lumpy. Pour into the pan and bake in the center of the oven about 30 minutes, or until the top is golden and the edges pull away from the pan a bit.
Let cool mostly before cutting or it will crumble beyond repair.

I recommend serving this with breaded catfish and something dark green and leafy.


If you don't have buttermilk handy (most of us don't) you can add about 1 tsp of lemon juice or white vinegar per cup of milk. Just add the spoiler to the milk and set it aside before you do any other prep work and it'll be nice and curdly when you're ready for it.

Wednesday, April 22, 2009

Brown Sugar Cake with Butterscotch Icing

I really wanted to bake a cake the other day, and didn't have any carrots for carrot cake, nor was I in the mood to bake that same chocolate cake again (though I do love it enough to only ever make it, my friends will tire of it, and that would be a shame). I took a yellow cake recipe from a cookbook I trust and adjusted some things and am quite satisfied with the result. Yves, my darling roommate, was hanging around this morning while I was taking photos of the cake and couldn't resist taking a bite, which turned into a slice. All she said was "Oh WOW." Good enough for me!

Butterscotch is a really gross color, if you ask me. I'm glad it doesn't look that way in the photo, because let me tell you how scary the icing looked when it was about halfway made. Pinky peachy brown, yucko. Fortunately the powdered sugar eased the eyesore a bit. Besides, butterscotch tastes so good, who cares what color it is? Probably only me. But I do look at colors analytically as part of my job, so I'm allowed. There are worse eccentricities.

Brown Sugar Cake with Butterscotch Icing

1 1/2 cups all-purpose flour
1 cup brown sugar
1 1/2 tsp baking powder
1/2 tsp salt
1/2 cup (1 stick) butter, softened
1/2 cup sour cream
1/2 cup milk
1 large egg + 2 egg yolks
2 tsp vanilla

Preheat the oven to 350º. Line two 9" cake pans with parchment paper and spray with nonstick spray. Set aside.
In a large bowl, whisk together the flour, brown sugar, baking powder, and salt. In a medium bowl, cream the butter, sour cream, eggs, and vanilla with a hand mixer. Add the wet ingredients to the dry and beat in until smooth and shiny, then scrape down the bowl and stir by hand for a few seconds to get rid of any remaining bubbles or flour.
Pour the batter into the two cake pans and bake for 20 to 25 minutes or until a toothpick inserted in the center comes out clean. Let cool completely before icing and assembling the layers.

Butterscotch Icing
1 bag butterscotch chips
1 cup butter (2 sticks) at room temperature
4 tbsp sour cream
3 to 4 cups confectioners' sugar
1 tbsp whole milk
pinch of salt

In a sauce pot over low heat, melt the butterscotch chips. Remove from heat and mix in the butter, milk, sour cream, salt, and confectioners' sugar with a hand mixer. Add more milk or sugar as needed to get the texture you prefer.

Assemble and decorate the cake as desired. Top with chopped walnuts if you know what's good for you.

Tuesday, April 21, 2009

Strawberry Waffles

You can't see it, but there are about a dozen chopped strawberries in this plate of waffles. If you don't believe me, well, look really closely and you'll see some dark red bits. The recipe I based this on was the "Oh Boy" Waffles from my grandma's copy of the Better Homes and Gardens cookbook from 1951. I strongly recommend spraying your waffle iron with nonstick spray before each waffle is poured. The oil in the spray helps a lot with crispy edges. The ones in the photo, for example, were made with no cooking spray, and you can tell they're not very stiff if you really look close. But don't do that, kthx.

Strawberry Waffles


2 1/2 cups all purpose flour
3/4 teaspoon salt
4 teaspoons baking powder
1 1/2 tbsp sugar
2 eggs, beaten
2 1/4 cup whole milk
3/4 cup vegetable oil
3/4 to 1 cup chopped strawberries

Heat your waffle iron.
In a medium bowl, sift the flour, salt, and baking powder and set aside. In a small bowl with a wooden spoon or whisk, combine eggs, milk, vegetable oil and sugar. When the waffle iron is hot, add the wet ingredients to the dry and beat until smooth. Pour about 1/3 cup (up to 1/2 cup, depending on the size of your waffle iron) at a time onto the center of the waffle iron. Bake until lightly browned. Serve warm.

Vanilla Pudding with Orange

When you get sick of cookies, there's a whole other world of desserts to choose from. Sometimes I forget that, but I have the good fortune of having friends around to remind me that I should make all sorts of other things for them to eat. This vanilla pudding was suggested by my friend Jen while in town for the weekend, and I had just bought a ton of particularly delicious oranges, so I figured, what the heck?

You can skip the orange juice & zest and leave the pudding at its more simple but equally delightful vanilla state, or replace the orange with lemon or lime or raspberries or [insert name of 20 more fruits here]. It's a nice base to work with. The citrus changes its texture a little, on the custardy side.

Vanilla Pudding with Orange

2 cups milk
1/2 cup granulated sugar
3 tablespoons cornstarch
1/4 teaspoon salt
1 teaspoon vanilla
1 tablespoon butter
2 tablespoons orange juice
1 tsp orange zest

Make room in the fridge.
Heat the milk in a sauce pan over medium heat until bubbles form at the edges.
In a medium bowl, combine the sugar, cornstarch and salt. Pour the dry mixture into the hot milk, a little at a time, stirring to dissolve. Add the zest and continue to cook and stir until mixture thickens enough to coat the back of a metal spoon. Do not boil. Remove from heat, stir in vanilla, butter, and orange juice. Pour into serving dishes. Chill before serving.
Sprinkle with ground clove for garnish if desired.

Friday, April 17, 2009

Thyme Tuna Melt

If I had to pick one thing as my favorite lunch food, it would have to be a tuna melt. I make more variations of them than I've ever bothered to count, but perhaps now that I am blogging many of my meals we'll see just how creative I can get with a can of fish and some bread. It doesn't sound very appetizing when I put it that way, does it? Well, try this next time you find yourself hungry for something diner-y and you might be in for a surprise.

It's worth mentioning that garlic and onion (as opposed to sour cream and onion) chips are extra super delicious with this. The oranges go well, too, especially if you add a pint of Blue Moon. I do love having a beer with fish lunches.

Thyme Tuna Melt


1 8-oz can tuna, drained
1 1/2 to 2 tbsp mayonnaise
a pinch of kosher salt
2 pinches of freshly ground black pepper
1 tbsp fresh thyme leaves (about 5 branches worth)
2 slices whole wheat bread
2 to 4 tbsp butter
2 slices monterey jack

Heat 1 or 2 tbsp of butter in a skillet on medium-high heat.
Combine the tuna, mayo, salt, pepper, and 1/3 of the thyme in a bowl.
Once the butter is melted and a little bubbly, sprinkle 1/3 of the thyme into it and set the slices of bread on top. Give them a minute or two to get toasty, and flip them over, adding butter and the last of the thyme to the pan before the bread goes back down. Immediately lay down the monterey jack and pile the tuna on in an even layer. Cover the skillet and turn down the heat to medium, until the cheese has made considerable progress toward melting. Uncover and put the faces of the sandwich together. Sprinkle with more thyme if desired.

Wednesday, April 15, 2009

Coconut Cookies, With or Without Dark Chocolate


Both of these cookies are from the same dough. After I baked the first dozen, I added a cup of dark chocolate chips and spooned lumpy globs onto the cookie sheet. They look and taste very different, but they're rich and sweet and the kind of chewy only coconut can produce.

For extra glam, dip the cookies in shredded coconut before placing on the cookie sheet.

Coconut Cookies
1 cup butter, melted and cooled to room temperature
1 cup sugar
1 tbsp vanilla
1 tsp coconut extract
1 egg + 1 egg yolk
2 cups flour
1/2 tsp baking powder
1/2 tsp cinnamon
1/4 tsp salt
1 cup shredded coconut
3/4 to 1 cup dark chocolate chips (optional)

Preheat the oven to 375º.
In a medium bowl, whisk the flour, baking powder, cinnamon, salt, and shredded coconut. Set aside.
In a large bowl, mix the butter and sugar with a wooden spoon. Stir in the vanilla, coconut extract, egg and egg yolk. Add the dry ingredients and stir until just combined. Add the chocolate chips if desired.

Drop in heaping teaspoonfuls two inches apart on a greased cookie sheet. Bake 8 to 12 minutes or until lightly golden around the edges. They will be chewier if you under-bake them a little, which I personally prefer.